There are a number of ways to put your photos in order and export them.
This is the method that I have found to be the easiest.
Step 1: Open your photos app on your Mac.
Step 2: Go to the menu in the upper left corner and click FILE, NEW ALBUM. You can name your album appropriately (ie, growing up, sports, family, etc.)
Step 3: Repeat creating a new album for each section of photos. If you are opting to have the photos chronologically from start to finish then you will only need to create one album.
Step 4: Go to your photo library and locate the photos you would like to use. Drag each photo into the appropriate album that you created in step 2.
Step 5: Within each album drag and drop the photos into the order that you would like
them to appear.
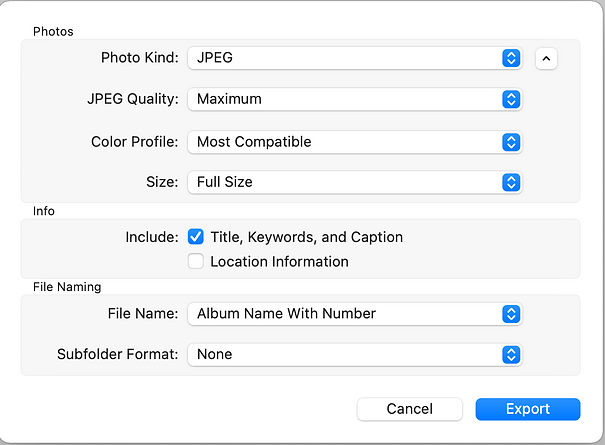
Step 6: When you are finished placing the photos in the correct order, go to FILE, EXPORT, EXPORT ALBUM. This will bring up a menu with options on how to export. Under the "File Naming" section MAKE SURE TO CHOOSE: Album name with number. This will keep your photos in the order you put them. The photo to the right is the setting that you should use to export.
Step 7: Once you have the correct settings click EXPORT. That will bring up a window allowing you to choose where on your computer you would like to save them.
Step 8: Notify me that you are ready to upload your photos and I will provide a link for you to upload them.

